The best time to move peonies is in the fall. Since this is Alberta, we can quickly run out of “fall”. At the time of moving this peony, snow was imminent and could happen any time. Just a quick note here, that you can move peonies any time of the year, but in the fall, once they have finished blooming is the best time, as this will likely not set it back too far for blooms the following season.
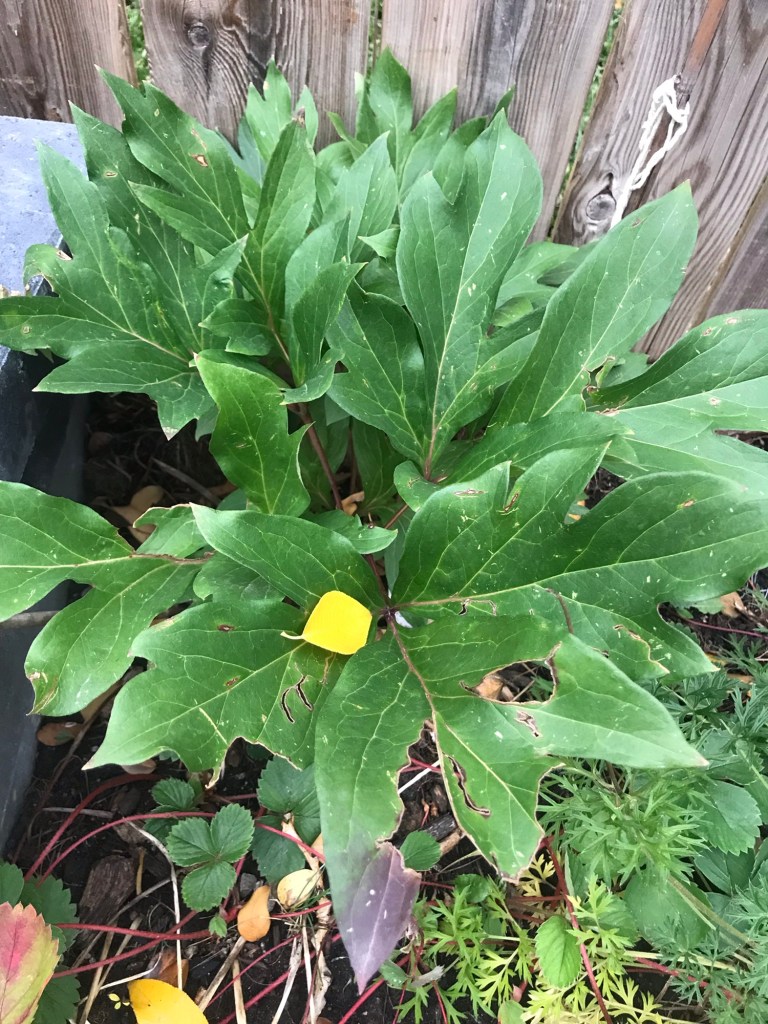
I have a ‘Cora Louise’ Itoh Peony and I don’t want to leave it here if we get an opportunity to move. It is beautiful and I have carefully rehabilitated it from her near death. So I am going to move it from here (where we rent but I’ve been able to garden my heart out), to my Dad’s house where my plants will be safe.
This was going to be no easy feat with a toddler in tow, so I was keeping my fingers crossed that the weather would at least cooperate. (Spoiler alert, it was a beautiful when I dug, and when I planted)
Did you know that Itoh Peonies are the product of a cross between a tree peony and a regular herbaceous peony? A Japanese botanist, Dr. Toichi Itoh became consumed with this monumental hybridization challenge, and in 1948, he achieved his dream when the first seeds germinated, after THOUSANDS of attempts. Unfortunately, he never got to see his new plants flower, as he passed away in 1956. His family carried on his legacy, and the first one flowered in 1964. Dr. Itoh’s widow gave special permission to an American botanist to bring some plants the the US, and he patented 4 plants, naming them “Itoh Peonies.”
Here is what I did when moving this gorgeous peony. I don’t have a photo of what the blooms look like, as I haven’t seen this particular plant bloom yet (since she has been recovering from near death), so hopefully I will get some photos in the next few years. Floret has a lovely write up about this peony on their website if you want to see some photos of her beauty.
Step 1: Dig Peony roots with as little disturbance as this disruption act as possible…
Since It has been so dry here in the late summer and fall, I had to give the area a very good soaking a few hours before I planned to dig, to give me a chance at digging easier without ripping everything apart. It rained the night before which helped my cause here as well. Keep the soil moisture in mind if you are also moving a peony (or any plant), since super dry soil (especially clay based soil like we have here) has kind of glued itself together, and breaks apart in big chunky clumps rather than a loose “fine tilth” like the garden soil of your dreams.
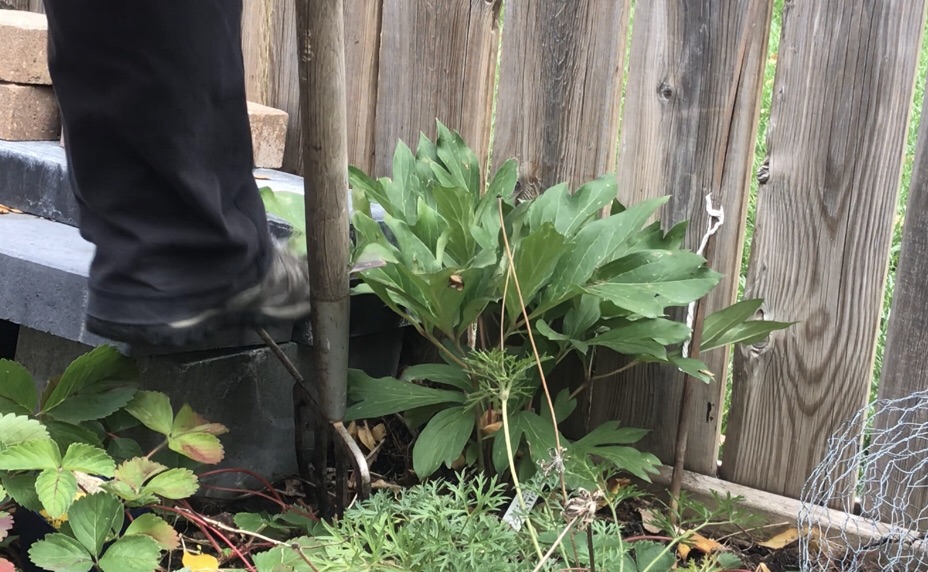
I dug pretty far away from the base of the plant as I can, without crushing neighboring plants. In here, along with the peony, I have bulbs, strawberries and other rehabilitated perennials crammed in close together. And I used my garden fork to avoid damaging too many roots and most importantly, the soil structure below the surface. My soil was nice and loose because of my watering the day before, so it came up pretty easily.
I removed any big clumps of soil if there was no roots around, just to make transplanting it easier, but the goal is to disturb them as little as possible. I also know that I don’t have any weeds in this area, so I won’t be bringing a new problem along with my peony to its new home. This is another thing to keep in mind if you are moving your own plants… Creeping Bell Flower is a huge problem around here, and is nicknamed the Zombie plant, so I would be very careful if that was a concern. You don’t want to bring a huge problem along with your pretty plant. If you are getting a plant from an unknown source (like on FB marketplace, or a trade with a neighbor), it might be a good plan to clean the roots off to be sure you are only bringing peony roots and not a bunch of zombie perennial weeds. This will set the plant back a tiny bit in the short term, BUT you will know that there are no nasties hiding in the root clump to cause issues further down the line.
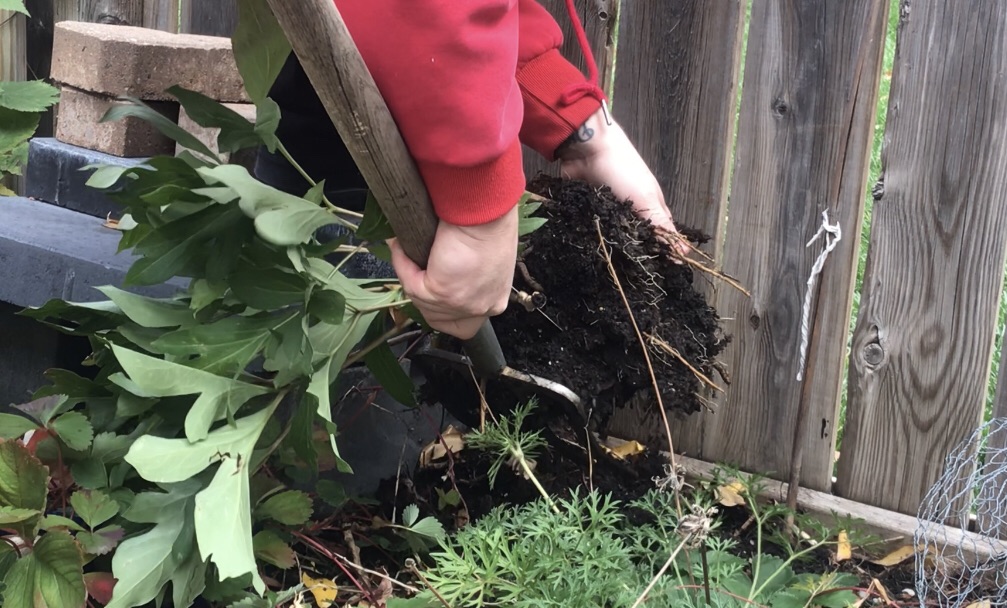
Step 2:
Place freshly dug peony into a big enough pot and cover with potting soil, and water in. Since I won’t be planting this the same day, I essentially potted this like it would be a potted plant. This will keep it as happy as possible until I get her moved to her new home.
Step 3.
Dig new home. Dig bigger than your roots, and make sure you keep the soil level the same, as peony roots that are planted too deep, likely won’t flower. Don’t add any fertilizer to the hole. It is fall and we want to encourage the plant to put its energy into its roots, and not a bunch of growth. You can fertilize it in the spring.

Step 4.
Water in well. Winter was happening anytime, so I wanted to make sure that there will be enough moisture in the soil to keep this beauty going until spring. I water it well, then do the next step… Then water heavy again. For additional moisture help, I put snow on the area over the winter as well, so as it melts in the spring, it slowly goes into the soil. Snow cover is an excellent insulator, so it helps protect the ground underneath from experiencing the huge temperature fluctuations we can get here in winter.
Step 5.
MULCH. Don’t skip this step. Mulch heavy to provide some insulation to the soil. I used leaves from the aspen trees that are 15 feet away, because they are free, and there and very abundant. Throughout the growing season, they will also quickly decompose into the soil, adding more organic matter and food for the friends in the soil. Mulch deep to provide some extra protection for the winter, and in the spring, you can pull some mulch away from the plant for the growing season.
I didn’t end up getting many still photos of this process, but I have made a reel on my Instagram, and I am working on getting a short up on the YouTube Channel.
This spring, I slowly pulled the leaves away from the crown of the plant, and was excited to see at least 3 bright red growth points. I can’t wait to check in on the plant every time I visit my Dad. If we get a chance later this Spring, I’ll give her some basic fertilizer but she will be fine if I don’t get to it.


Leave a comment